1970’s Laundry Room Gets French-Country Charm
When my mom asked me for some easy, inexpensive décor ideas to update her laundry room, I went a little overboard. It quickly escalated into a full-on laundry room makeover. My mom has a beautiful French-country cottage style, but she lives in a 1970’s era home. She loves old world charm, neutral colors, and authentic pieces. It was a challenge forcing the 1970’s back into the 1700s with a small budget, but we did it!
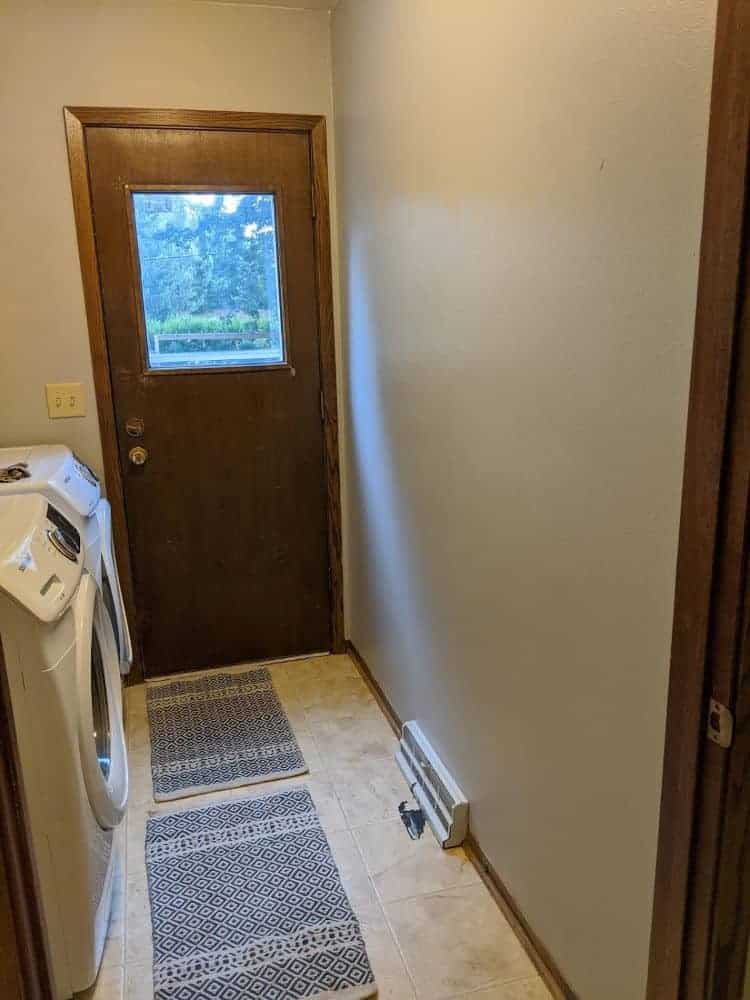
laundry room before + after


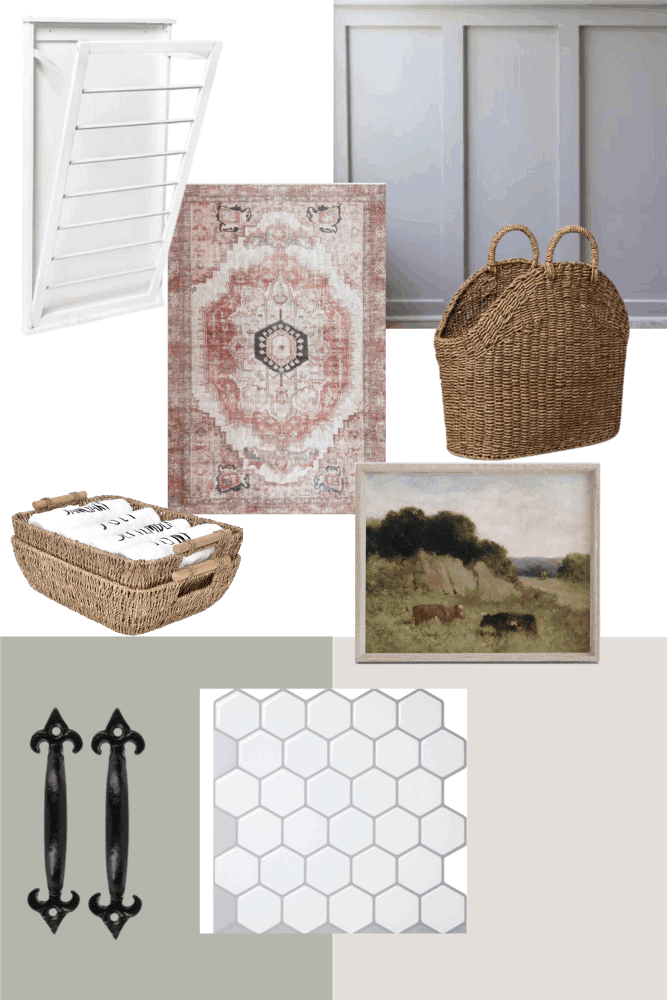
laundry room design plan

Although we could have gone crazy with this laundry room makeover, the budget was our primary constraint. We would have loved to update the flooring, door, and sink, but since it’s the laundry room, she didn’t want to overspend. Instead, I planned a few simple cosmetic upgrades to refresh the space.
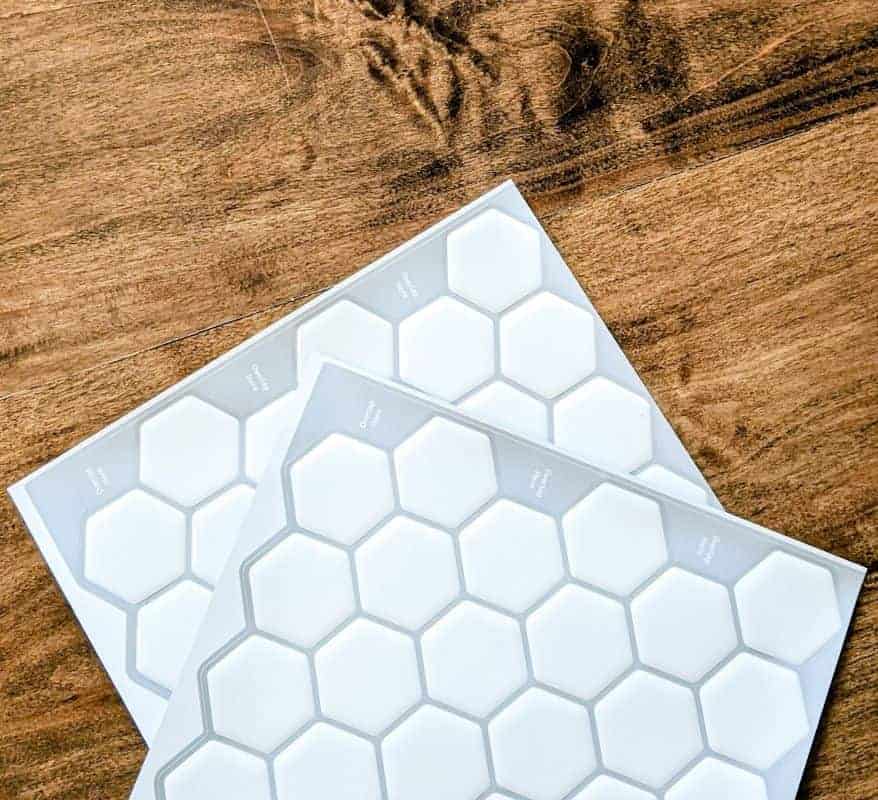
- Peel and stick tile accent wall (We were so grateful to have these gifted to us from the Tic Tac Tiles Company)
- Paint – SW Incredible White | SW Sensible Hue
- Board and batten accent
- Refinish the slop sink
- Hide water hook-ups
- Update hardware
peel + stick tile accent wall

Perhaps the most significant impact on the room is the peel and stick hexagon tile wall. We used the Hex Mono White tiles from Tic Tac Tiles. The Hexagon-shaped tiles are so versatile because they work for modern or classic styled homes. I used these hexagon tiles in my apartment coffee bar; click to read more.
I love this company because its 3D tiles are such excellent quality and easy for anyone to use. Because they are heat and humidity resistant, they would also be perfect for bathrooms and kitchens. We chose peel and stick tiles because they are temporary, quick, and a budget-friendly fix that looks high-end and realistic.
how to install peel + stick tile backsplash
- Scissors or razor (I prefer using scissors)
- Level
- Pencil
- Measuring tape
- Ruler or something with a straight edge

step 1: Clean + Prep Surfaces
For the tiles to stick correctly, the wall needs to be oil-free, dust-free, and completely dry. Tic Tac Tiles recommends using TSP cleaner to prep the wall but depending on how dirty the surface is, soap and water work too. In a kitchen, heavy oil residue is more likely, so I would highly recommend using TSP in this case. Make sure the wall is completely dry before laying tiles.
Remove all outlet covers. Trying to trim around the covers after putting the tiles up is a hassle and looks choppy.
Note: Peel and stick tiles DO NOT work on textured walls. I didn’t realize my mom had textured walls, so I had to sand down all the bumps, clean the wall, and then use a dry rag to make sure all the dust was gone.
step 2: Draw a guideline
Walls are generally not entirely even, especially in old homes, so don’t follow the ceiling or baseboards as a guide. I drew a single plumb line for the first row of tiles using a level that kept me on track for laying the whole wall. When I did these tiles in my apartment, I didn’t use a guideline, and wow, does it make a difference for how quickly you can lay them!
step 3: Apply peel and stick tiles
It’s pretty self-explanatory from here. Be aware, the tiles are very sticky, so make sure they are aligned correctly before pressing down. Also, when using the hexagon tiles, be sure to overlap the gray grout consistently. Because there are many edges to align with the hexagon tiles, if you don’t overlap the grout enough, they look choppy and more noticeably fake.
Note: If you are laying these around a sink, it’s a good idea to caulk the seams where the tiles meet the sink. This will prevent water from splashing under the tiles and causing them to peel.
We were so impressed with how these hexagon tiles brightened up the laundry room and added so much needed texture.


5 pro tips for installing peel + stick backsplash
Paint
Painting this room was a must for this laundry room makeover. Everything was gray, and I knew for the accent color to stand out, the walls needed to be white. We decided on Sherwin-Williams Incredible White for the walls and Sensible Hue for the accent color.


We went through four different colors in search of the perfect accent, before finding Sensible Hue. I really wanted the accent color to feel warm and also have a historical cottage vibe. Is that a thing?! Sensible Hue was absolutely perfect. It’s is a neutral, warm gray with sage green undertones.
We took the accent color into all the trim and painted the door white. This really made an impact since the old trim and door color really detracted from the other improvements.
board + batten accent

Adding character to the laundry room was really important to create the old home charm we wanted. This board and batten accent adds yet another layer of texture to this little space. Plus, it’s super easy to install (I did it myself).
It’s also cost-effective because you’re basically framing the wall. We also saved by using pre-primed MDF boards, but you can use real wood too.


Initially, I planned to accent just the long wall but decided to take it all the way around to the cabinet for a more built-in feel. I’m so glad I did; it made the whole room come together! In total, we spent roughly $60 on this addition.

resurfacing the plastic utility/slop sink
The plastic slop sink was in really rough condition. It wasn’t in the budget to get a new one, so I used Krylon Tile and Tub ultra repair finish on the inside. Not sure how this will hold up long-term, but it looks revived and fresh for now. I read up on this product a lot, and most articles recommended not running water in the sink for about 36 hours after application.
Side note: Make sure you use this in a well-ventilated area and wear a mask; it’s potent stuff!
I was also planning to paint the outside of the sink but decided the distressed surface added some authentic character. Instead, I finished off the old yellowing logo with some gold spray paint to dress it up.
hiding water hook-ups


A huge eyesore was the ill-placed water valves right above the utility sink. There was no simple way to hide the pipes, but my mom last-minute found this beautiful shelf with a decorative overhang. We were excited it only cost $15 from Ross. It just barely covered the valves, but that was enough!
updating hardware

Sometimes it’s the little touches that really make all the difference. My dad switched out all the old yellowing outlets for new white ones. This simple touch made a huge difference! We also spray painted the old cabinet hinges, and air vent black to tie in with the new french-inspired cabinet pulls and black towel hook.
adding French-country style
Now for the fun part: accessorizing!
Incorporating unique pieces is key for getting that old cottage charm and complete the French country style.


We warmed up this space with natural elements such as the wooden shelf, woven baskets, and copper accents. The antique floral picture, a thrift find, fits perfectly beside the cabinet.

The rug was another last-minute purchase from Ross; it was only $16, and it ties in the grays, greens, and pinks throughout the room. To finish it off, fresh-cut flowers from my mom’s garden are tucked in a market basket, and a beautiful olive tree completes this cozy laundry room makeover.

I hope you enjoyed this laundry room makeover as much as I did! Drop a comment below if you have any questions!
shop the post


Good day very cool blog!! Guy .. Beautiful .. Superb .. Irene Lorant Rawden